
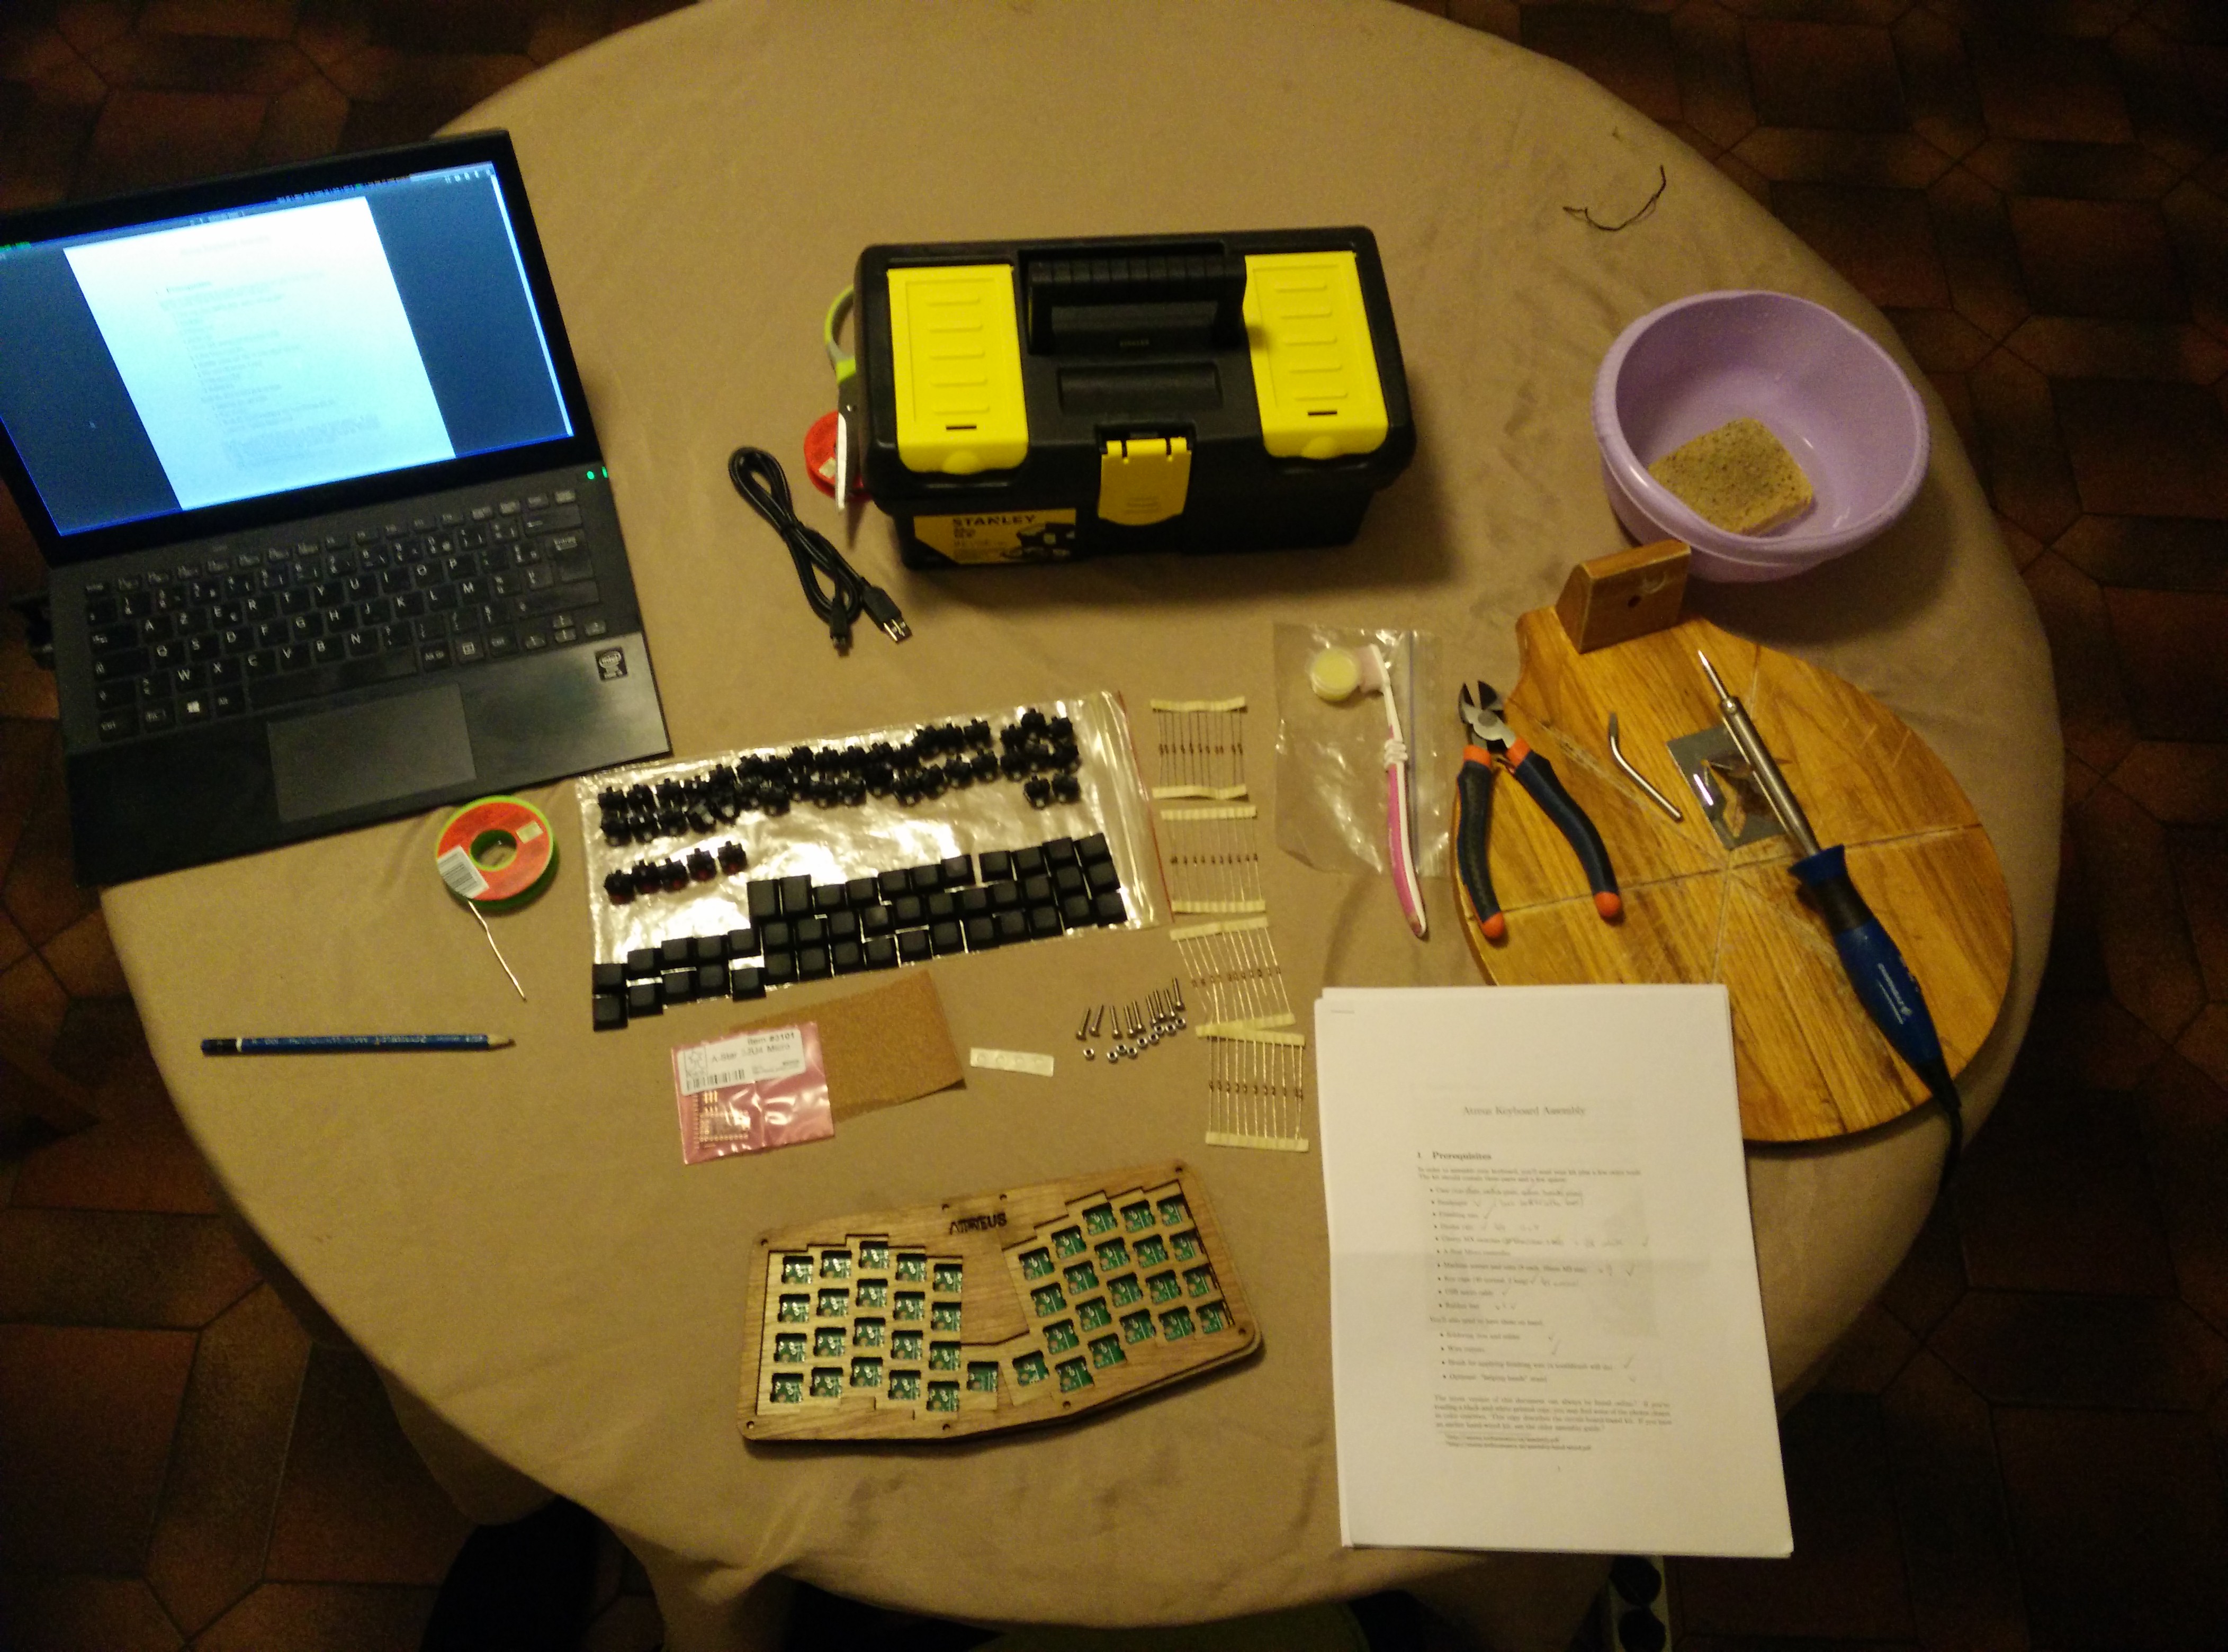
Assemble
First assemble it using the excellent documentation from http://atreus.technomancy.us/assembly.pdf.
This can take some time. It took me more time than anticipated, one night with lots of coffee + some extra hours of debugging. But it was awesome!
It took me some time because:
- I'm not a solder iron expert (last time I manipulated one was at least 15 years ago).
- I did not have an unsoldering pump (it's a good idea to have if like me you're kind of first timer).
- I used a too large iron diameter (1.5 mm). Soldering got better with 1mm.
- I did miscomprehend some parts of the documentation. This lead to some unsoldering and soldering back session (not that easy without the right tool).
So let's go for some details after that - the firmware installation and the investigation on the improper behavior.
Pre-requisite
Tools
Install pre-requisite dependencies:
nix-env -i avrdude avr-gcc-libc
Firmware
Clone technomancy's repository:
git clone git@github.com:technomancy/atreus-firmware.git
Note
There is another repository which is a fork of tmk/tmk_keyboard (branch atreus).
git clone git@github.com:technomancy/tmk_keyboard.git
git checkout atreus
Hard reset the first time by connecting RST and GND 2 times in less than 1 second (with a wire for example). If you succeeded, the LED will start blinking differently for 8 seconds.
Which is the time you have to try and upload the firmware you chose. Type `make upload` in the terminal from technomancy's fork folder.
Something along those lines will appear.
# tony at dagobah in ~/repo/perso/atreus-firmware on git:master o [4:17:54]
$ make upload
while [ ! -r /dev/ttyACM0 ]; do sleep 1; done; \
avrdude -p atmega32u4 -c avr109 -U flash:w:atreus.hex -P /dev/ttyACM0

Connecting to programmer: .
Found programmer: Id = "CATERIN"; type = S
    Software Version = 1.0; No Hardware Version given.
Programmer supports auto addr increment.
Programmer supports buffered memory access with buffersize=128 bytes.

Programmer supports the following devices:
    Device code: 0x44

avrdude: AVR device initialized and ready to accept instructions

Reading | ################################################## | 100% 0.00s

avrdude: Device signature = 0x1e9587
avrdude: NOTE: "flash" memory has been specified, an erase cycle will be performed
         To disable this feature, specify the -D option.
avrdude: erasing chip
avrdude: reading input file "atreus.hex"
avrdude: input file atreus.hex auto detected as Intel Hex
avrdude: writing flash (3278 bytes):

Writing | ################################################## | 100% 0.25s

avrdude: 3278 bytes of flash written
avrdude: verifying flash memory against atreus.hex:
avrdude: load data flash data from input file atreus.hex:
avrdude: input file atreus.hex auto detected as Intel Hex
avrdude: input file atreus.hex contains 3278 bytes
avrdude: reading on-chip flash data:

Reading | ################################################## | 100% 0.03s

avrdude: verifying ...
avrdude: 3278 bytes of flash verified

avrdude: safemode: Fuses OK (E:C8, H:D0, L:FF)

avrdude done.  Thank you.
Looking at dmesg, the keyboard is disconnected and reconnected:
[234924.640433] cdc_acm 1-2:1.0: ttyACM0: USB ACM device
[234931.190801] usb 1-2: USB disconnect, device number 17
[234931.473927] usb 1-2: new full-speed USB device number 18 using xhci_hcd
[234931.639206] usb 1-2: New USB device found, idVendor=16c0, idProduct=047c
[234931.639215] usb 1-2: New USB device strings: Mfr=1, Product=2, SerialNumber=0
[234931.639220] usb 1-2: Product: Atreus
[234931.639223] usb 1-2: Manufacturer: Technomancy
[234931.640720] input: Technomancy Atreus as /devices/pci0000:00/0000:00:14.0/usb1/1-2/1-2:1.0/0003:16C0:047C.0004/input/input12
[234931.640971] hid-generic 0003:16C0:047C.0004: input,hidraw0: USB HID v1.11 Keyboard [Technomancy Atr eus] on usb-0000:00:14.0-2/input0
And now your keyboard should be alive.
Note The firmware installed here is the default one for Atreus.
Status
Now typing using your keyboard should display things. For me, it worked the first time except for some keys:
w e d k x c , ENTER SUPER
First fix
Just trying to add some more iron on the switches not working fixed it for some:
- ENTER works
- w (stopped)
- x
- ,
- k
Not enough?
The remaining non-working part turned out to be a column of key (`sw:9` ; e d c SUPER).
After multiple looks at my board, I did not see anything troubling.
As I saw only one side of the board, this meant the problem lied on the other side…
Which meant unsoldering all switches.
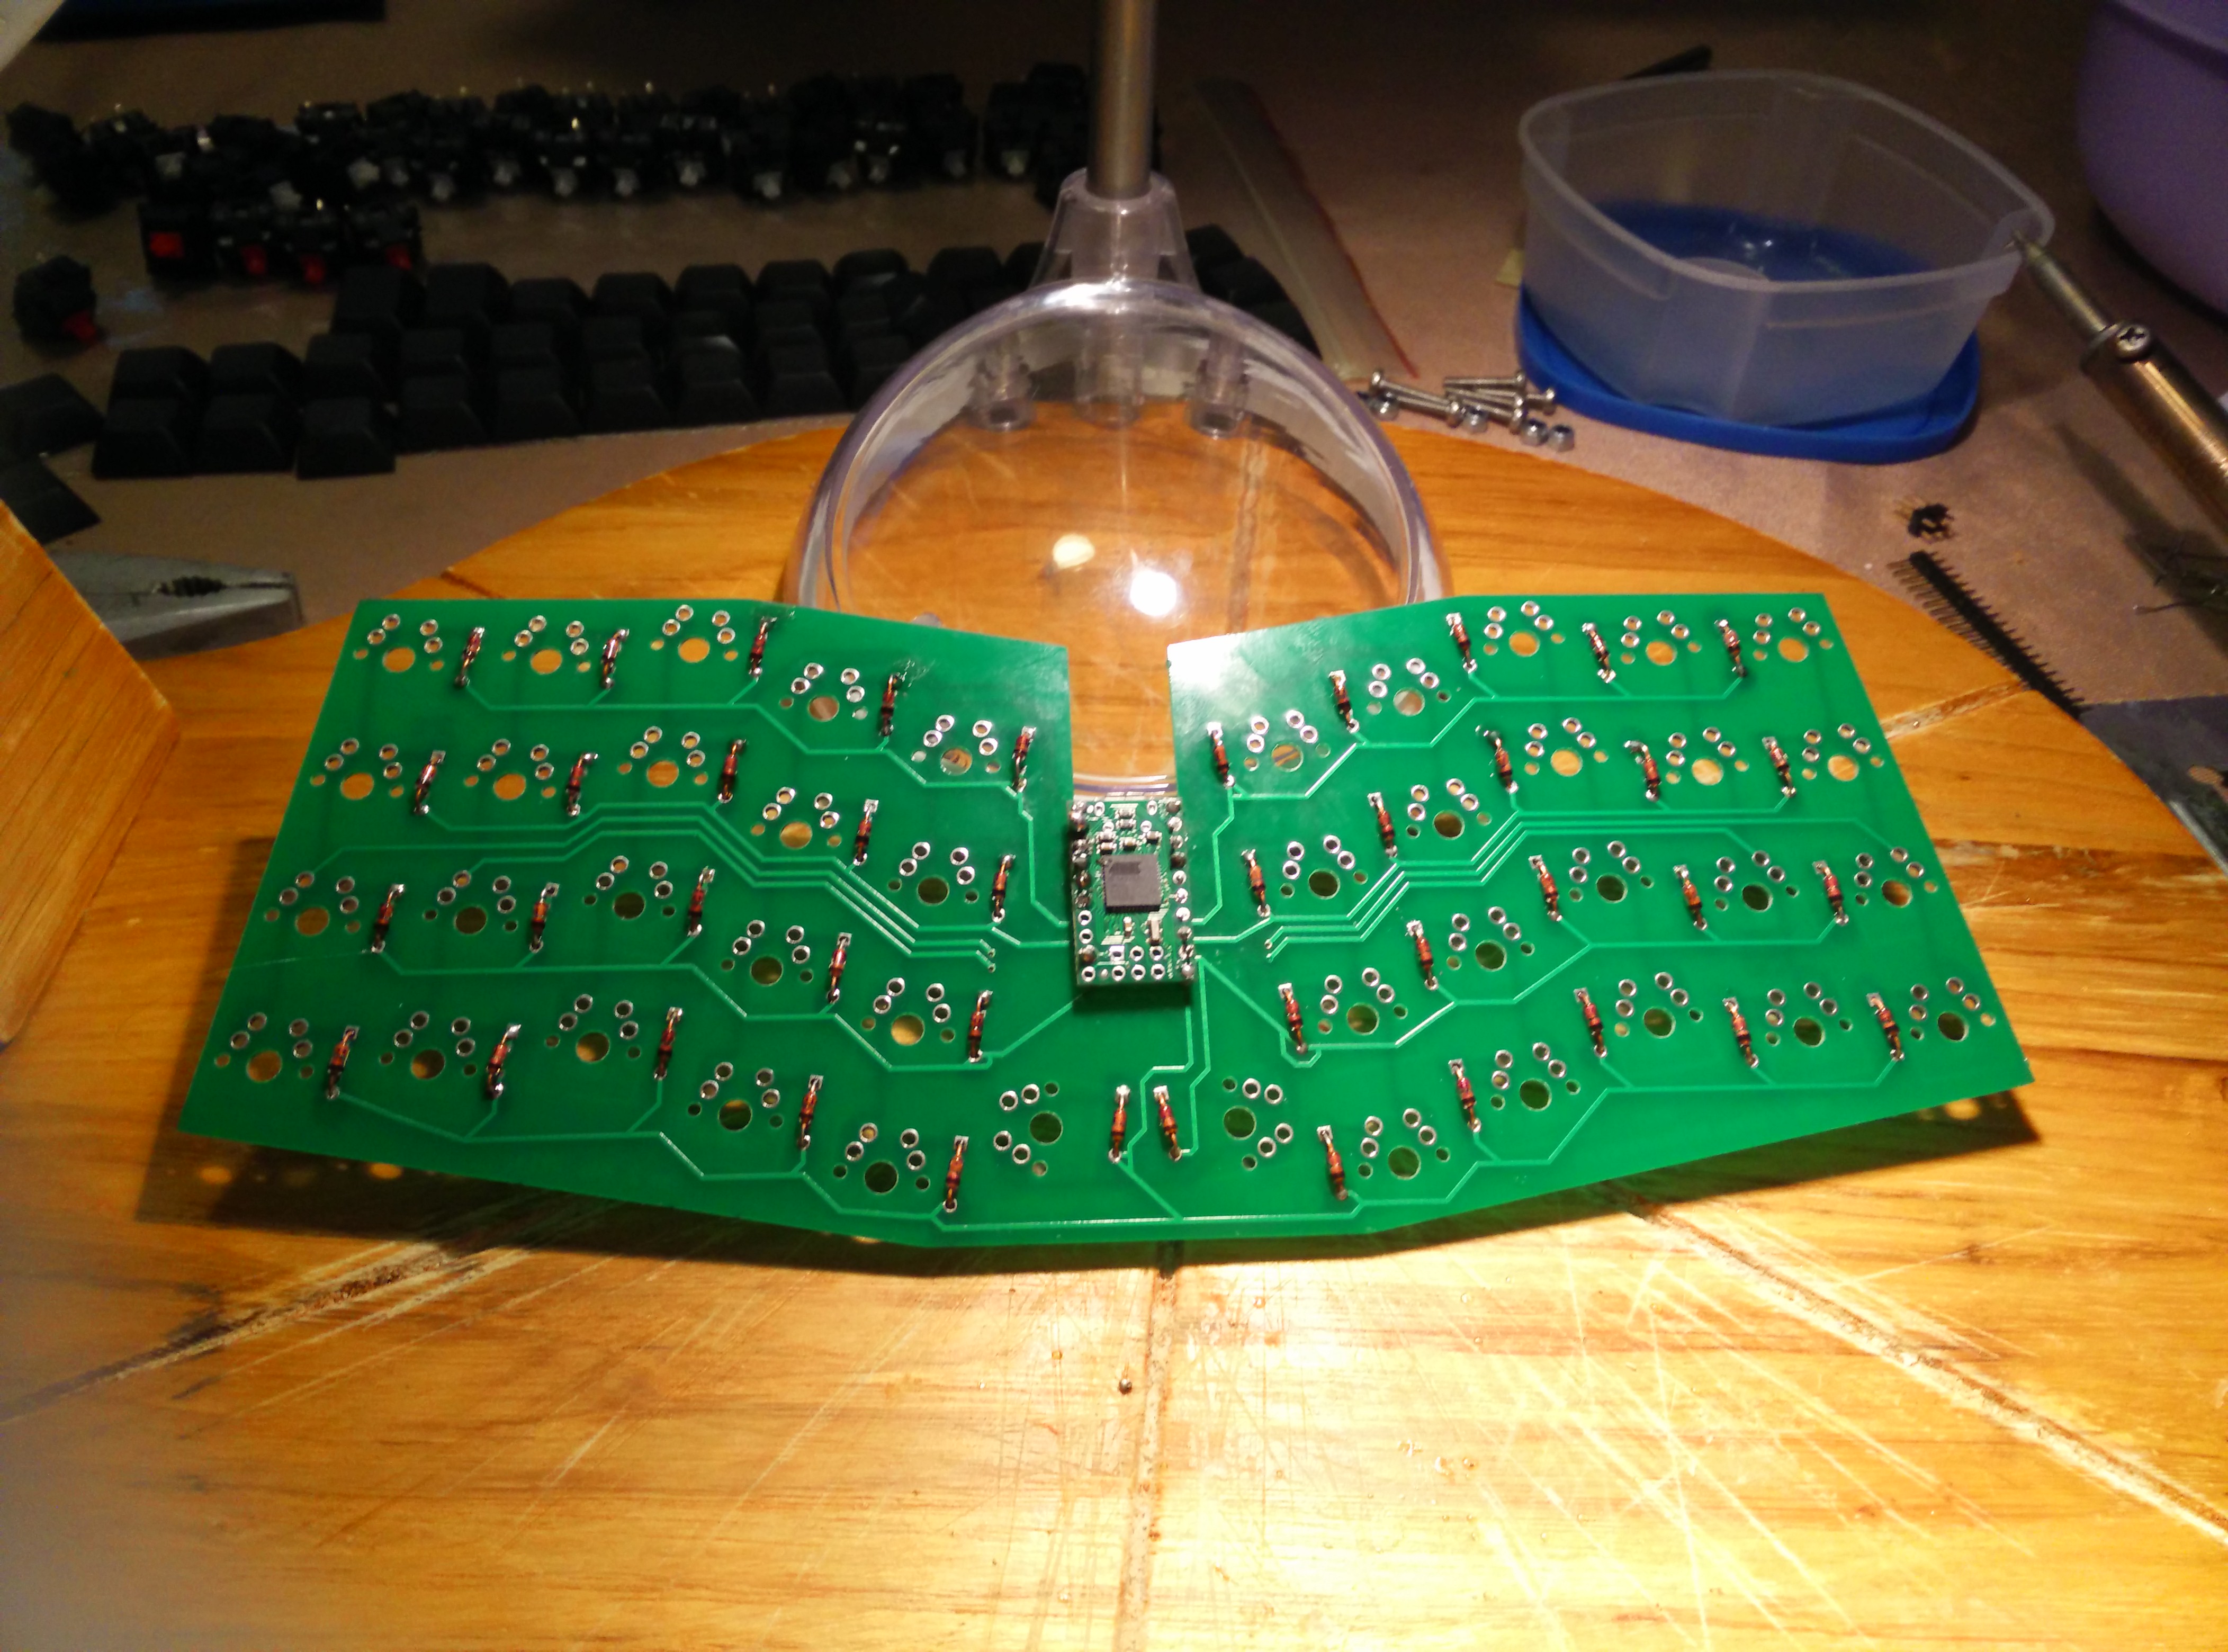
First, I tried to look at some pictures I took before soldering. As you can see, there are lots of iron. Not so much is necessary, I used 1.5mm diameter iron which is too much, 1mm is largely enough and result in less iron once melted.
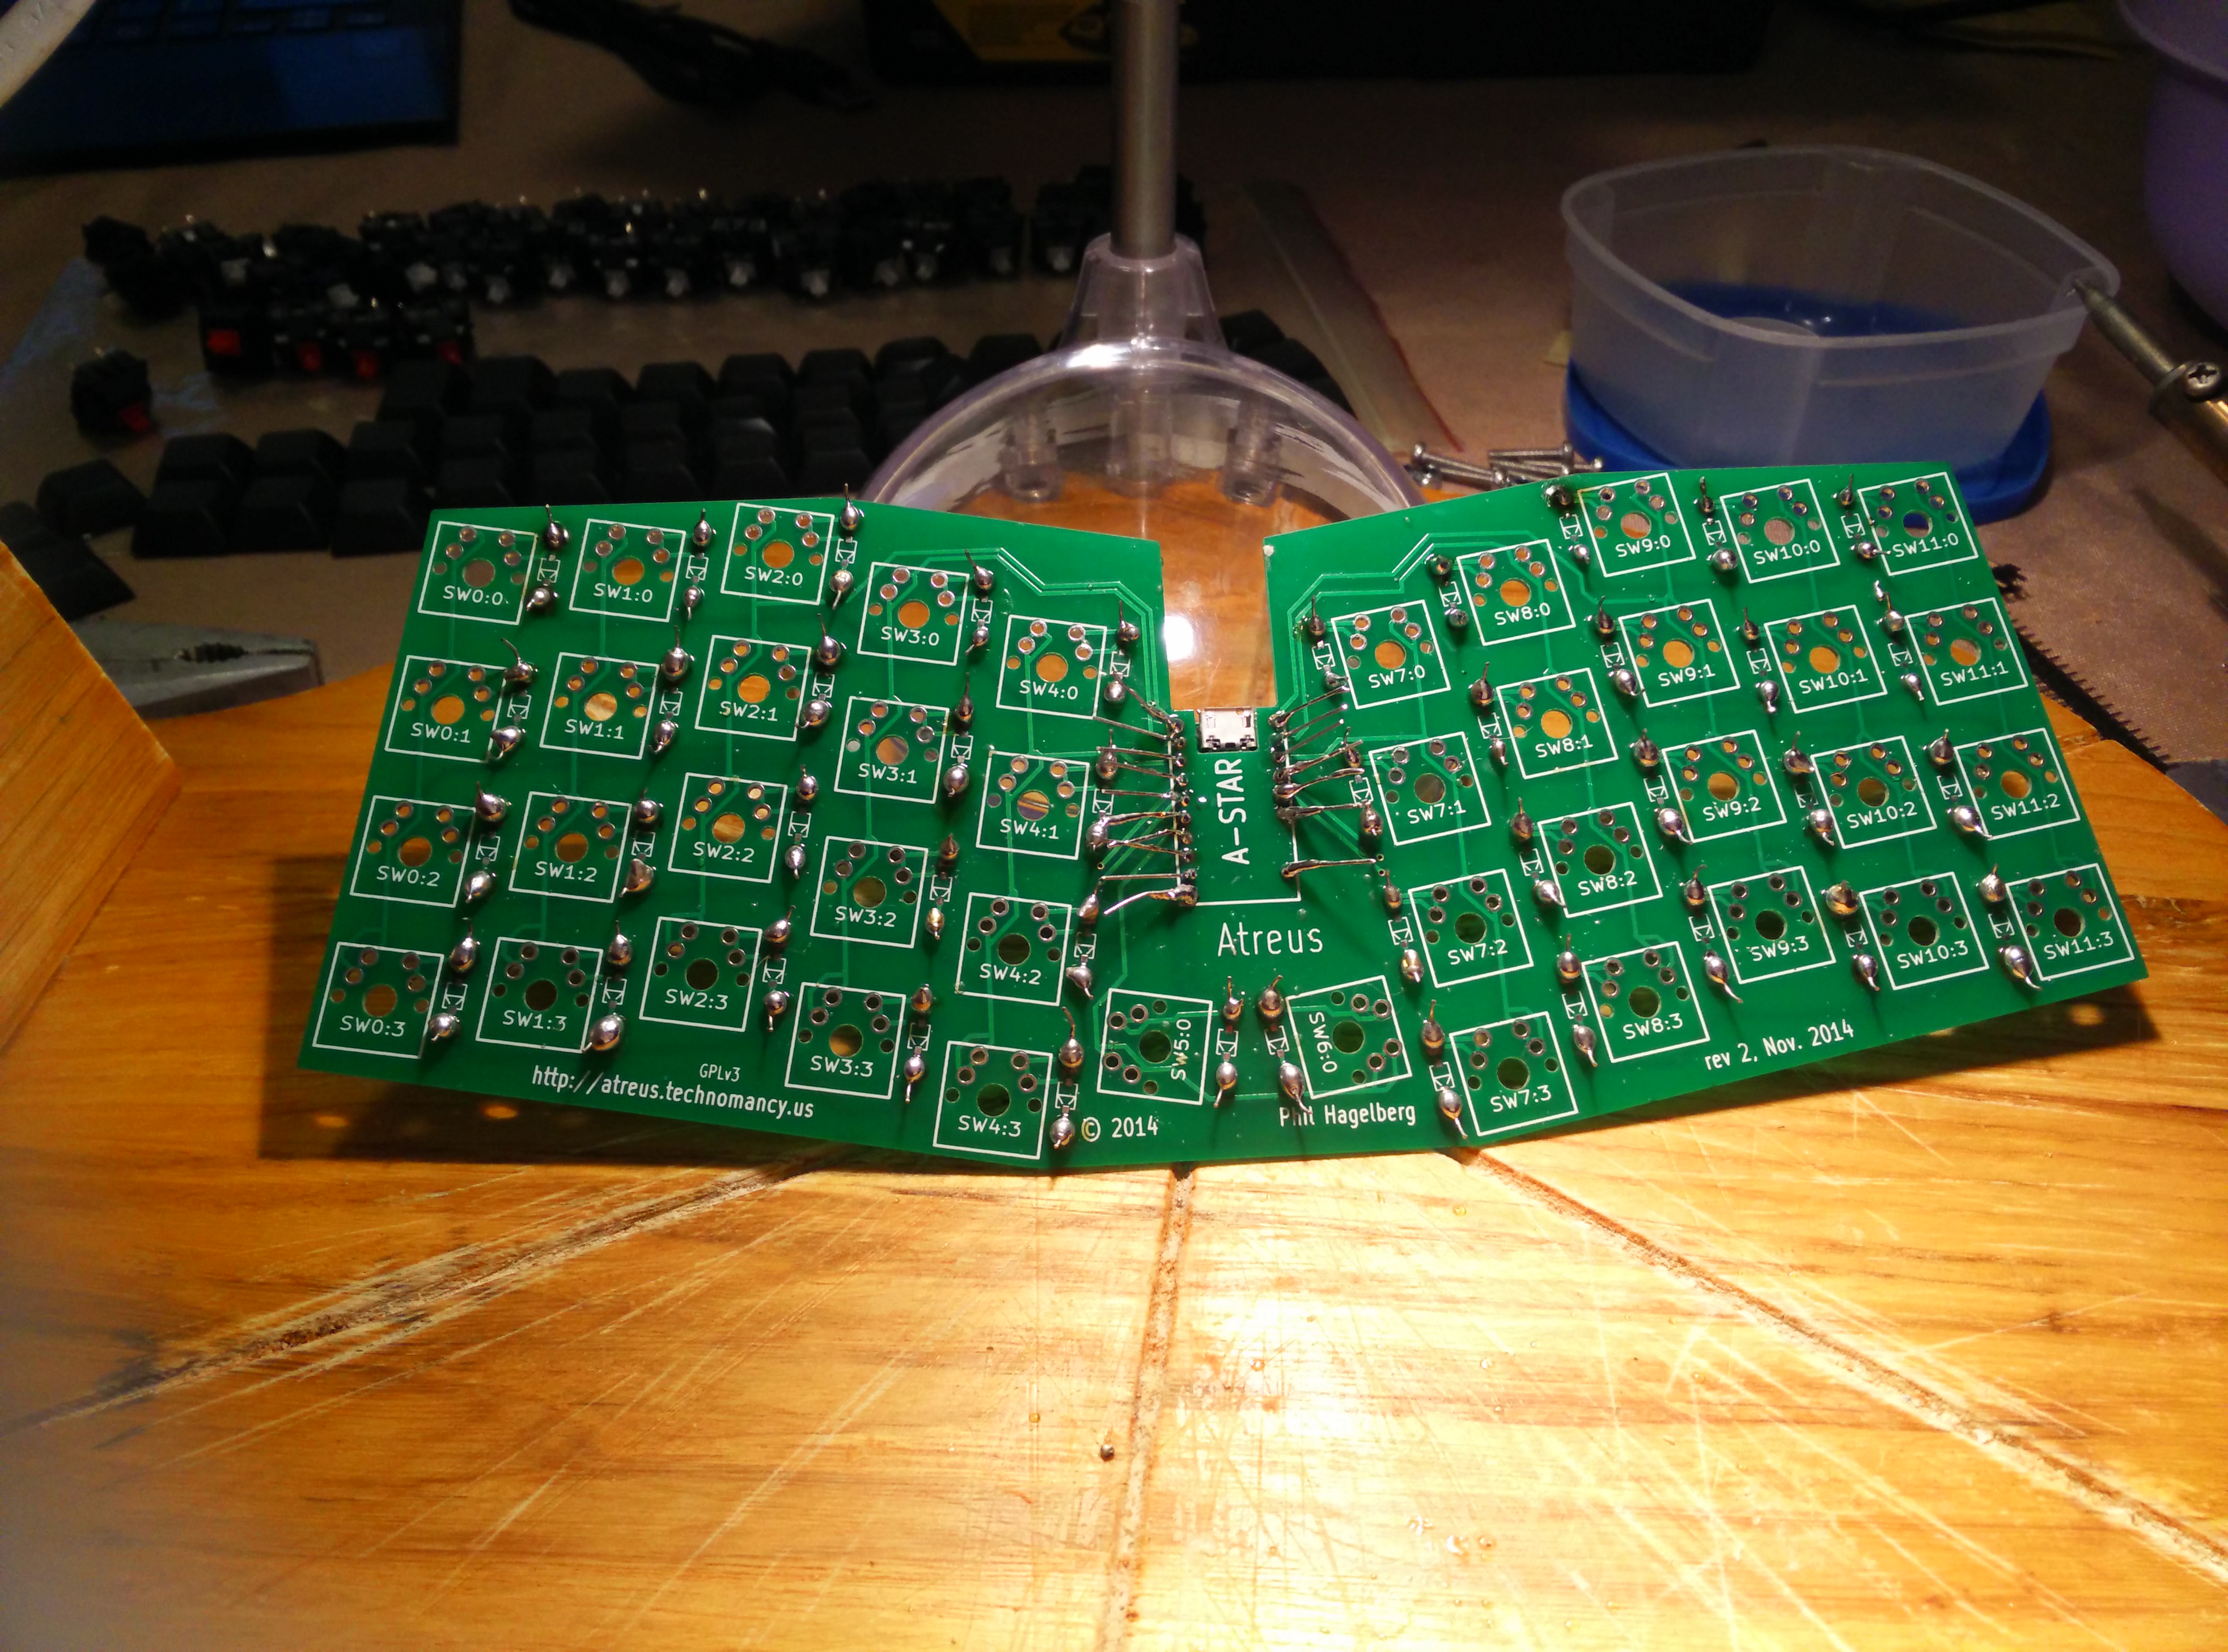
I did not see much on the pictures. I needed to see the real thing.
I sent some questions to technomancy and he confirmed that either it was:
- some solder on the diode that went bad (checked as seen before in the previous paragraph)
- or I had to unsolder switches to access the other side.
Do and undo, it's still work
So, no way around it, I had to unsolder all switches…
And indeed, on the other side, some diodes were cluttered with too much iron. So I cleaned up.
Still, this was not the reason.
I guess more experienced user would have realised sooner that a non-working column meant an a-star pin was responsible. And technomancy suspected as much but I did not understand immediately because the problem moved along as I kept fixing columns.
That is, after some clean up session, sw:9 started working but then the sw:10 column stopped ('w', 's', 'x', …) and then sw:10 worked but sw:11 ('q', 'a', 'z', …) no longer…
Somehow, I finally got it.
Cleaning up the pins and adding just enough iron (1mm again :D) and everything finally worked!
feedback loop
I should have searched for a simple way to ensure everything was ok before soldering the switches the first time around. After all 42 keycaps times 2 switches for each is kind of long to solder (and unsolder in case of errors, which could easily happen… :D).
I got it right the last time around though. Before soldering back, I ensured everything was ok.
I simply took one wire and connected the switch pins of the same keycap. Indeed, if everything is ok, the keyboard must then send the appropriate signal and your current software should print something. If not, there is an issue.
So, I did this to ensure every keycap was ok. And when all 42 keycaps did what they were supposed to, I soldered back!

Conclusion
It works!
Woohoo!
Now on with the firmware adventure!